


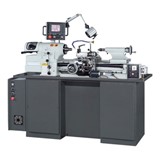
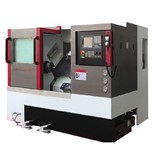
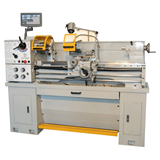
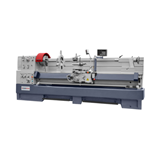
Before a PINACHO ML lathe is delivered from the factory, it undergoes rigorous quality controls to verify and ensure that the settings are appropriate for optimum machine performance. However, due to factors such as handling, transportation or anchoring in a new location, as well as daily use, these parameters may change.
To obtain accurate results and a quality finishing on our parts, it is essential to periodically check the alignment of both the headstock and tailstock. In addition, if misalignments are detected, it is important to know the necessary steps to correct them effectively.
The main objective of the alignment is to achieve a straight line formed by the main spindle axis and the tailstock, so that it is parallel to the bed guides.
In this video, we present a detailed guide on how to detect if the headstock and tailstock of your manual lathe are correctly aligned and, if they are not, how to make the necessary corrections to optimize their performance.
To carry out an accurate alignment of the headstock of a PINACHO ML lathe, it is essential to have the right elements and tools. In this case, we will use a reference part with a length of 250 mm and a diameter of 70 mm.
The main objective of the alignment is to achieve a straight line on the main axis of the spindle, making sure that it remains parallel to the bed guides. To check the alignment, once the part has been machined, we will use a micrometer to accurately measure the diameter at both ends.
If we detect a deviation measurement that exceeds the standards established in standard 8606 (0.015 mm), it will be necessary to proceed with the alignment of the headstock.
To carry out this process, we will access the bolts that anchor the headstock to the bed by carefully removing the frontal plates and loosening the front and rear bolts.
Once we have got access to the regulation screw located at the back of the headstock, we can correct any deviation or conicity that we have previously detected. To perform this detection, we will use a dial indicator, placing it precisely on the machined part and adjusting the back screw in the proper direction, in order to correct the measured deviation and achieve a perfect alignment.
In addition, it is vitally important to check the roundness of the part. Using the micrometer, we will verify that the deviation is less than the 0.01 mm established as a limit, especially in the part closest to the spindle. This check will ensure that the part has a rounded shape and has no deformity.
Finally, it is necessary to check the parallelism of the slide with respect to the main axis. To do this, we will move the slide longitudinally, using the dial indicator as a guide and placing it on the workpiece. Repeat the height measurement to ensure that the deviation does not exceed 0.01 mm. Maintaining perfect parallelism is essential to achieve accurate and quality machining results.
In summary, headstock alignment on a parallel lathe is a crucial process for accurate part machining results. By following the above steps and using the right tools, you can achieve optimal alignment to ensure smooth operation and exceptional quality in your machining works.
Always remember to carry out the periodical checks and necessary adjustments to keep your PINACHO ML lathe in perfect condition and to extend its service life.
To achieve accurate tailstock misalignment correction on a PINACHO ML lathe, a sequence of technical steps must be carried out. Following, we will detail the procedure to be used for such a correction in order to obtain an optimal alignment.
First, we loosen the four bolts that hold the tailstock to the base, allowing it to be moved. We also loosen the six upper screws to release the tension in the system and, finally, we leave the two front and two rear bolts loose.
The correction to be applied to the tailstock should be half of the error previously determined with the dial indicator. We will use this reference to make the necessary adjustments.
We must adjust the tailstock alignment bolts depending on the desired direction of movement. If we wish to move the tailstock towards the shield, we loosen the bolts on the back side and tighten the bolts closest to us. If the direction is opposite, we will apply the adjustment in reverse.
Once the correction has been made, we will perform a new check using the dial indicator to verify that the deviation has been corrected. This step is essential to ensure accuracy in the alignment.
If any deviation persists, repeat the above procedure as many times as necessary until a tolerable level of deviation is reached.
Once the correct alignment of the tailstock has been checked, we will proceed to firmly tighten the clamping bolts to the base, as well as the upper, front and rear bolts. This will ensure proper fixation of the tailstock in its corrected position.
Finally, it is advisable to perform an additional check of the angular alignment. To do this, we will make a pass over the workpiece with the tailstock barrel extended, verifying that no deviation is present.
By following these steps precisely, we will be able to correct the lathe tailstock misalignment and obtain an optimal angular and axial alignment, which will result in accurate and quality machining results. Remember to perform periodic checks and necessary adjustments to maintain accuracy over time.


(3)-205x205.jpg)