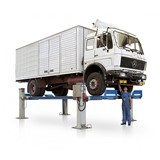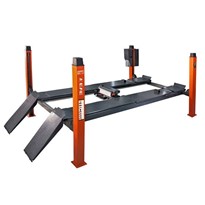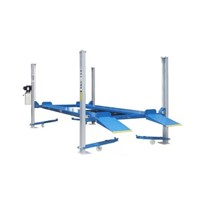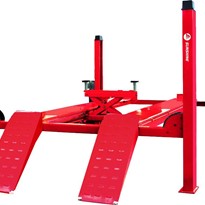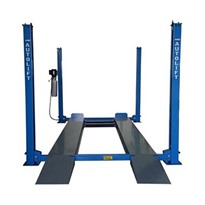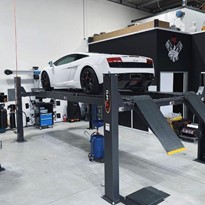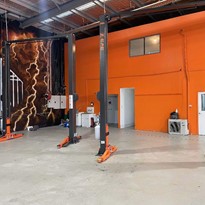


Setting up a Four Post
Positioning of the Four Columns
Begin by positioning the four columns and deciding which side the power unit will be on. Move that column into place first. Afterwards, measure the spacing between the remaining columns according to the manual and relocate them accordingly. You should align the columns as accurately as possible. To check if they are square, measure diagonally across from one corner column to another and compare it with two other diagonal measurements.
Installing the Cross Beams
To install the cross beams, check that they are oriented correctly. Then, slide them through the top of each column. The cross beam holding small windows should be placed next to the column holding the power unit. Both cross beams’ windows should face each other.
Installing the Ladders
To install the ladders, insert them through the top of each column and slide them down until they reach the cross beam. Then, slide the guide slots in nylon blocks of the cross beam until touching the bottom of the column.
Installing the Top Caps
Before you install the top cap, ensure that the ladder’s threaded rod has a nut and flat washer. Use M8 bolts and nuts to secure the top cap in place. Now take another nut and screw it onto the aforementioned threaded rod, this time using a nyloc nut for extra security.
Gaps at the Bottom of the Ladder
You must space the bottom rung of the ladder 1/2? away to protect it from potential base damage. To do this, you will need to prop up the cross beam with a trolley jack until you can see the column’s bottom; only raise it high enough to get a good look, not all way to lock in position.
Setting the Primary and Slack Safety Locks
Use a trolley jack to raise the cross beams, even with the first holes on the ladders. Then, put the safety locks on to secure them in place. Now, you will need both primary and slack safety locks for the ladder; but only lock in the primary one at this point.
Raise the cross beam until the safety locks are in-between the first and second holes of the ladder, then press and hold each small cable pulley towards the column while lowering the jack. Doing so will allow only the primary to engage. After, ensure that all four columns have the correct lock settings.
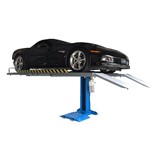
Mounting the Runways on the Cross Beams
Starting with the power-side runway, use an engine crane to take its weight and then unbolt the steel transport frames from both ends.
Setting up the Safety Cables
To extend the cylinder, remove the brass plug at the bottom and the red plastic bung from the end of the hydraulic hose. Then, while lying under the power-side runway, slide out nylon blocks to release slack safety pulleys until they are free from the top caps on each column. Attach a nut to the exposed threading to remove excess slack before adding nylon locking nut.
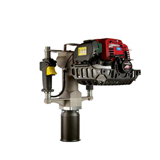
Mounting the Power Unit
Attach the power unit to the provided mounting plate with nuts and bolts. In addition, install two extra brackets: one for the hose protector and another for the pneumatic switch. Run a hydraulic hose from the cylinder through tabs under the power-side runway and hole inside. Attach plastic protector before connecting hydraulic hose to power unit using 90° fitting provided.
Filling the Tank With Hydraulic Oil
Fill the tank with hydraulic oil until it meets the line on the dipstick. You might have to refill after a few uses to get rid of any trapped air.
Attaching an Air Source to the Safety Lock Release Actuators
The pneumatic switch must be connected to the bracket using the screws provided. If you wish to connect the air compressor directly to the hoist, replace the bottom push fitting with a 1/4? BSP Nitto style fitting.
The power-side runway has an airline channel running through it to prevent the cable from rubbing. The airline branches off into a tee fitting at each end of the hoist, supplying cables leading to the winch on both sides. These channels protect your air hose as it runs alongside the hydraulic hose and past the power unit bracket, delivering pressurised air to safety-release actuators located at each column.
Wiring up the Power Unit
To raise the hoist, it will need power from a 16AMP power unit. Connect the power unit to the hoist. The pneumatic locks can be released once the air hose connections are tightened and checked.
Levelling the Runways and Adjusting the Safety Cables
Before levelling the runways, secure the hoist on the first safety locks. If the floor is levelled, use a tape measure to check that all four ends of the runways are at an equivalent height. If they aren’t, then adjust ladder heights until they match. Use a laser level or spirit level across runways if the floor isn’t level. Raise the hoist a few centimetres and measure all four corners again. Adjust safety cables to level out runways, so all four locks click in sync when raising the hoist.
Bleeding the Air From the Hydraulic System
Begin by checking that the emergency stop is off, then turn on the hoist to maximum travel. To release the safety locks, press the pneumatic switch and use the lever to lower the runways. With no weight on them, it might be a slow process.
The cycling hoist might need to be used 2-3 times until it operates smoothly, meaning that air has been bled correctly. If the cables have been adjusted properly, both safety locks should click as they go up. If they are not quite in sync, make some final adjustments until they line up perfectly.
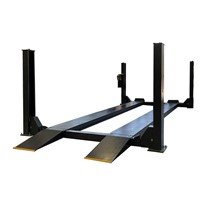
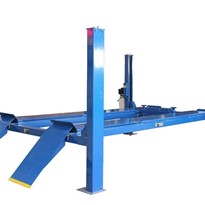
Installing the Ramps & Wheel Stops
Place the ramps close to your desired entry point. Afterwards, use the pins to go through the cross beams and ramps, so they’re attached securely. If you need to cut any pieces, do so now and then hold everything in place with split pins. For the wheel stops on the other end, ensure the flat edge points upwards before proceeding. Repeat these steps for all remaining wheel stop locations.
Anchoring Your Hoist to the Concrete
Secure your hoist to the concrete by drilling four 20mm holes on each column and driving in anchors with a large hammer. Tighten all anchor bolts until firmly secured.
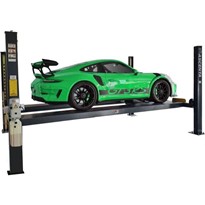
Lifting and Lowering Your Vehicle
To raise your vehicle, drive it from the parking space onto the hoist. Press the button to secure it at your desired height. To lower your vehicle again, ensure the primary safety locks are in place a few centimetres from the floor. Then, while pressing and holding the pneumatic switch, pull down on the level to lower your car.
Final Thoughts on Setting up Four Post Hoists
Setting up a 4 post car hoist can be daunting, but with the right guidance, it doesn’t have to be. We hope this guide was able to provide some assistance with the steps necessary for setting up a 4 post car hoist.
As long as you carefully measure and hold to the safety requirements for your specific model, you should have no difficulty setting up your own 4 post car hoist. From taller vehicles to jacking beams and even parking spaces, careful configuration is critical to any successful hoisting job.
It includes professional workshops and home garages that recreate this environment in their own right. Considering all of these factors when looking at a 4 post car hoist will ensure that you get the most out of your purchase while staying safe during every step of your car work project. It is really important that your 4 post car hoist is installed correctly.
It is always best to have a professional installation. Please contact Tufflift for assistance with professional 4 post hoist installation.
About Tufflift
When purchasing a hoist, it is important that you have peace of mind and know that you are dealing with a company that has been operating for nearly 30 years. Tufflift is a leading international hoist manufacturing and distribution company based in Australia with over 60 years of combined experience in sales, installation, and service.
We pride ourselves on our quality, product range, and customer service to ensure you choose the right hoist for your requirements.
All our hoists come with a comprehensive step-by-step installation guide that allows easy assembly by one person.
Tufflift also offers an installation service in most states. Contact our team today to learn more.
-160x160-state_article-rel-cat.png)

-160x160-state_article-rel-cat.png)