Video Transcript:
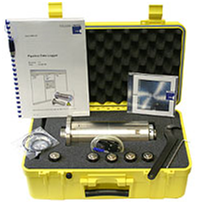
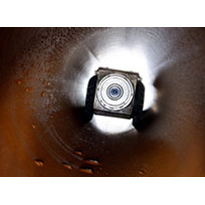
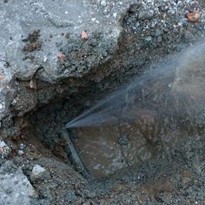
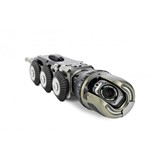
Hi guys, I'm Paul from Russell Fraser Sales. Today we're going to be looking at what's in the box with one of the new options from Creaform: PipeCheck. So here we have the Handyscan 700 - we've looked at this in more detail in another video. This is our pipe sample (just a small sample we have for this demonstration). You've got a few patches of corrosion and some drilled holes. We're going to have a look at that and see what the scanner can find. So for the sake of this demonstration, I'll take us through guided analysis. I'm gonna skip some steps. Just for the sake of time. But this is a guided view that will take you through step by step and help you set it up. So we for this sample we're going to do a corrosion analysis. It's a straight pipe you can if you have a slightly bent pipe you can straighten it. We're not talking elbows or anything you guys. Just if you have a slightly damaged or slightly bent pipe you can straighten it out to avoid any error in the pit gauge. This is where you're putting your parameters whether you want metric or imperial measurements, pipeline owners that kind of stuff this is already set up for this this pipes, but this is where you put in your features such as pipeline diameter wall thickness those kinds of things. Quite a nice flow all the parameters a few steps. You guys will understand all this. Interaction parameters - how you want to use it fit to shape throwing box any number of options? How you want to choose your grid so at the moment we've got it set of 25ml so one inch in the old system and your color scheme and then here you can choose which parameters you want to have. So we're gonna take scan only you can also import UT data into this. So if you have something like a wheel probe and you've taken ultrasonic data from the inside of the pipe you can import that data into PipeCheck and then get a true wall thickness. But for this we're just going to use the scan. I'm going to do a new scan, set the resolution at one millimeter. So here it's asking if we want a reference to on reference cam - what that's referring to is this - so this is the reference error. This is a magnetically mounted error stick onto the pipe Points in the direction of flow and this is your reference point. So if we chose to do a reference scan, the first thing the scanner wants to see is this this specific error. They're all serialized Parameters are very accurately measured once it's used this every part of the scan will be reference to this so you can take this arrow and say it is say 600ml don't flow from weld ABC and now everything will then be referenced to this for the sake of this demo. We're not going to use it. So It's asking to do a calibration that's using the calibration plate that comes with the scanner. I've covered that in the other video. Same in the configuration. I've already set it up for this sample. Now there's a few tips about setting up the positioning targets here for you. Okay, so the first thing we're gonna do is scan the targets. So hold the scanner about 30 centimeters away. And there we go - it's that quick - doesn't matter if the sample moves around as you can see, okay. And now we're gonna begin the actual scan so button on the back begins the scanning and there we go. You can see it collects the data very quickly a little bit close as you can see by the by the bar on the left. So I'm just gonna make sure I get into all the data little pits they're really close. That should be enough. Okay so I'm not gonna save the session. Normally, I would ask you to save the data the raw data in case you want to come back to it in a moment. I'm gonna there's a few bits of my arm and things in the scan here. I'm just going to delete the isolated patches. So this is asking for parameters - so it models a virtual pit gauge when it does an analysis, so it wants all sorts of parameters. So it's asking for things like how many extensions do you want to put on there how long they are? Everything you'd wanna know. Approximate length of the longest visit my frozen that's about 200ml. So I'll put 200 and there we go it's assumed what we need from that. I don't need to exclude anything if you have a world or some dirt or an off-shoot pipe you can tell it to exclude certain parts of data and then it will work around that. Use all surface and here we have our analysis. So using the interaction rules, it's using AS BB 31 G we can see each feature individually. So feature number four here has a debit. Or you can see our ideal cylinder or on the outside there. Let's go with sort by max depths - deepest point is in hit number four maximum depth six point zero nine millimeters. Everything you'd want to know you get a look at each feature individually and from there. We can import data if necessary if you have it do not import and choose our File type so keep this point in CSV files we're going to do a Excel report that's asking which ones we're going to use. Select all of them and I'm just gonna put this as sample. So from there I was gonna generate a report. And here we have our completed report, so it has an overview page also has each feature individually and finally a signatures page - very detailed analysis as a once again. You can export all the raw data if you want to do your own analysis but it is a very powerful tool. So this is PipeCheck software - This is the Handyscan 700 and both are available through Russell Fraser sales. If you have any questions, please feel free to contact us.


-205x205.jpg)
-205x205.jpg)
(1)-205x205.jpg)